博客平台更换
今年穷,租不起服务器了,所以只能把博客整体搬到 Github 上。另外之前用的网易云跟贴也跪了(我真是用一家倒一家)。本来是打算用 Gitment 不过作者似乎弃坑了。所以现在用 Gitalk 替代评论系统。Next 主题下目前(截止 2017.11.20)已经有 Gitalk 的 Pull request,不过似乎还是有各种 bug (我试过了)。估计过段时间就会接入正式版本吧。在这之前还是得自己动手。讲道理应该说的详细一点,不过 Hexo 部署到 github pages 上的教程网上多如牛毛,就不在废话了(其实是当初搞的时候忘记了记下来了现在懒得回去弄了)
Gitalk 配置
我是根据这个博客来手动配置的。
申请 Github 的 Application
如果没有申请的话,可以直接点这里申请。注意填写信息时的 Authorization callback URL 这一项需要填正确的博客地址(比如我填的是 https://zjuturtle.com)。
在申请后,要记下 Client ID 和 Client Secret 两个信息,后面会用到。
Next 主题修改
我们需要修改 Next 主题下的 4 个文件
layout/_third-party/comments/gitalk.swiglayout/_third-party/comments/index.swiglayout/_partials/comments.swig_config.yml
注意原博客的变量名有点问题,这里做了一点基本的修改。
layout/_third-party/comments/gitalk.swig 文件
直接新建一个名为 gitalk.swig 的文件,并填入以下内容
1 | {% if not (theme.duoshuo and theme.duoshuo.shortname) and not theme.duoshuo_shortname %} |
layout/_third-party/comments/index.swig 文件
在该文件加入一行代码
1 | {% include 'gitalk.swig' %} |
layout/_partials/comments.swig 文件
在差不多文件末尾的地方加上
1 | {% elseif theme.gitalk.enable %} |
_config.yml 文件
在这个文件加入以下设置项,并填入相关信息。
1 | # Gitalk |
Tips:如果出现 '未找到相关的 Issues 进行评论' 的字样,则登陆 GitHub 授权即可
SSL 实现
因为博客托管在 Github 上,所以在实现 SSL 上有点麻烦(毕竟不能直接)。我借助的是 cloudflare 曲线救国的方式来实现的,虽然严格来说不能算是全链路 https,但起码不会被无良运营商夹带私货。
一些基本的修改
最好是能先修改 Hexo 博客的部署方式。在站点目录下的 _config.yml 文件里修改如下内容
1 | deploy: |
然后把博客的源代码切换至其他分支(我用的是source)。这样每一次的部署只要运行以下命令就可以了
1 | hexo clean |
Cloudfare 设置步骤
设置步骤基本参照了这个博客。
我们要做以下几步工作
- 注册
Cloudflare,添加个人网站 - 获取
Cloudflare的Domain Name Server - 在域名提供商处修改自己域名的
Domain Name Server为 2 所获取的 DNS - 在 CloudFlare 的 Crypto 中开启 SSL 加密,选择
flexible(似乎full也可以?) - 在 CloudFlare 的 Crypto 中设置 Always use HTTPS
- 在 GitHub 仓库设置中设置自定义域名
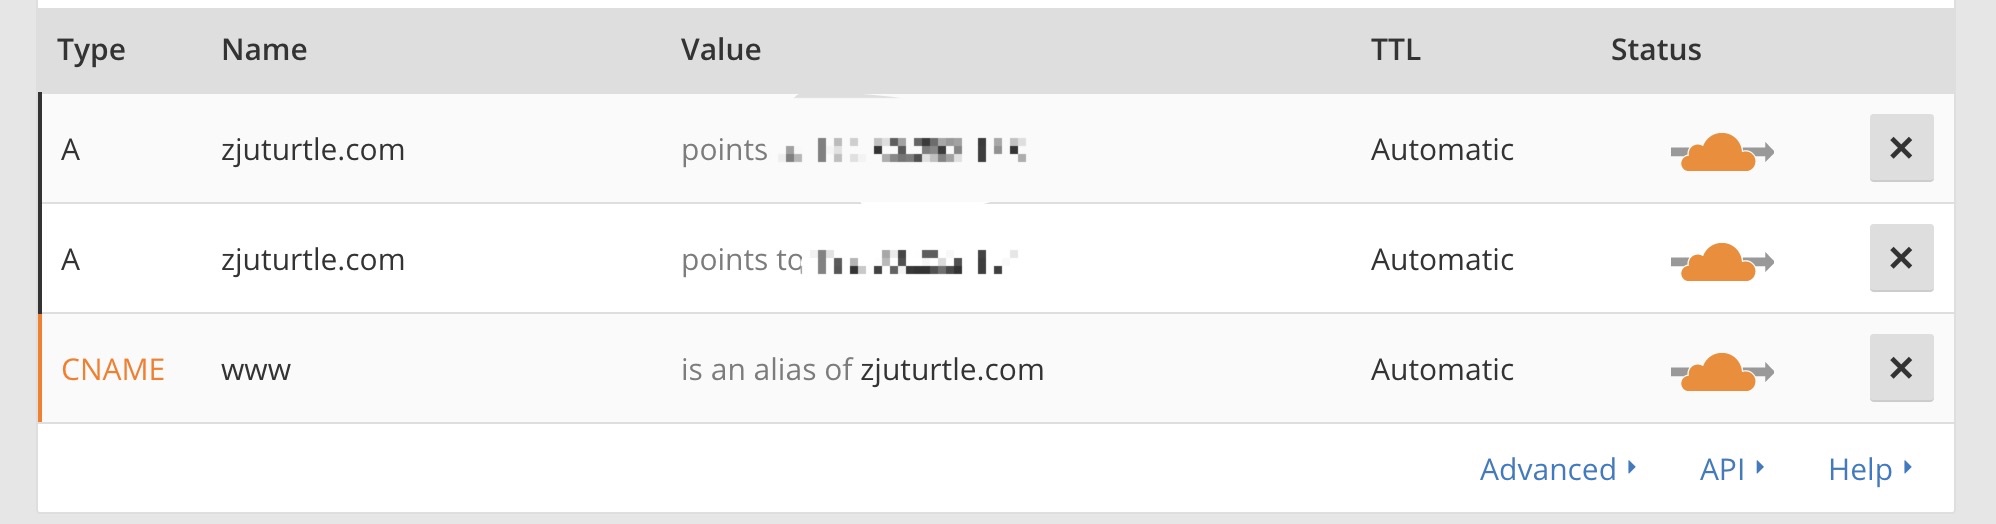
在 Cloudflare 的 Crypto 上我用的是 Full 模式。而在 DNS 界面上,我的信息是这样的
大体思路就这样,当初没有具体详细的记录每一步,现在懒得回去再弄了。。。实际上 Cloudflare 上还有很多设置可以玩,大家可以自行研究下。